Sunday, August 29, 2010

"Why Don't They Just Play With It the 'Right' Way?!"


I used to get really frustrated with my two youngest boys when they were little. (Okay, well, I still do, but that's another post...)

I bought Marble Works with the intent of nurturing my kids' imaginations. I envisioned them spending countless hours configuring the pieces into various marble tunnels. Laughing and having fun together. What ended up happening was, they spent countless hours using those pieces to configure different guns of various sizes, to shoot each other. Throwing marbles at each other, sticking marbles where marbles shouldn't go....laughing and having fun together. I kept thinking, "I'm glad they're having fun, but why don't they just play with it the 'right' way?!"

But, seriously, weren't they using their imaginations? UGH! Okay. Yes they were. Not the way I wanted them to, but they were, nonetheless.

I decided to use their example of thinking outside the box when I made this card. My inspiration came from Heather Nichols' beautiful floral card. I decided to use my Awash with Flowers stamp set with craft paint instead of ink to make this pretty card. Yes, it is a bit messier as far as clean up goes (use baby wipes for clean up), but I really love how it gives texture in real life. Plus, using paint makes the image show up better on patterned paper than regular ink. Then I used crochet thread to stitch French Knots in the centers. Not too bad for my first attempt at French Knots, huh? The other "outside" thinking came with the eyelet lace border. I took my scallop border punch and used my 1/16" hole punch to punch 3 little holes in each scallop. I then added texture to the border by using my Big Shot and my Square Lattice embossing folder. It really reminds me of a dress I had when I was little.

Marble Works is long gone, but memories of my boys' imagination still inspire me. What can you take from your life, past or present, to inspire your crafting? I'd love you to share with me!

Wednesday, August 25, 2010

Dressing up patterned paper


I remember as a child in elementary school loving the holidays because we got to do fun paper crafts. And I loved it especially when we got to use glitter. It was so fun smearing the glue on the paper, then pouring glitter on. And then when I shook the excess off to reveal my glittery design just made me all the more happy! I don't know if my mom ever felt this way, but once I started having kids, I HATED glitter. Hated that it got everywhere, hated that it was all over the kids, all over things it shouldn't be. So I stayed away from glitter for a LONG TIME. But slowly, over the last year or so, I've become enamored with it again. I'm loving how it gives dimension to projects, and when it catches the light just so....love it.

I have this adorable Halloween patterned paper from Stampin' Up! and it was just yelling at me to bling it up a bit. Of course, stripes are so easy to dress up. All I did was place Sticky Strip (much less messy than the white school glue!) down a few of the stripes, then spoon on some black glitter I have in my stash. (make sure you kind of press down on the glitter to really get it good and stuck on the Sticky Strip). Then shake it back in your container and PRESTO! You have awesome embellished patterned paper that you would have spent at least twice as much for in the store! And don't witches and black glitter just naturally go together?!

Stamps: Wicked Cool Clear - #120600; Wood - #118738
Ink: Basic Black - #101179
Markers: Old Olive - #100079; Rich Razzleberry - #120970; Pumpkin Pie - #105115
Cardstock: Whisper White - #100730; Basic Black - #121045; Pumpkin Pie - #105117
Specialty Designer Series Paper: Wicked Fun - #117400
Punches: 1 3/4" Circle - 119850; Scallop Oval - #119856; Oval - #119855
Sticky Strip - #104294
Black Glitter: In my stash

Thursday, August 5, 2010

September Stamp-A-Stack: Thanks


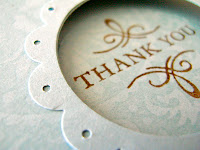
So, as promised, here is a little peek at the Thank You cards we'll be making at our next Stamp-A-Stack class. I agonized over these for what seemed like weeks but I really like how they turned out and can't wait to get together with you to help you make them!

Be sure to keep scrolling to find out how you could come to the November Stamp-A-Stack for FREE!

As always, you can bookmark my SU! site for my full calendar of events:


See you at the table :)

New Catalog Sneak Peek!


I'm really getting excited for my new Idea Book & Catalog open house later this month. There are so many fun new stamp sets and accessories. And I think the new color collections are just so inspiring!

Here's a little peek of the project everyone will get to make at the open house. It's a color combo I just love! (Pacific Point, Old Olive, Tangerine Tango, Early Espresso, & Crumb Cake)

Don't forget, for every $30 you order at the open house (before taxes and shipping) your name will be placed in a drawing to attend the November Stamp-A-Stack for FREE! And...until August 31, 2010, catalogs are just $7! ($10 after August 31st)

Bookmark this link for my calendar of events!


See you at the table :)

Be creative....it's good for you!

Monday, August 2, 2010

Extra! Extra!


Are you in West Valley, or surrounding areas? Until August 31, hostesses can earn so much more by hosting a workshop!

With a $350 workshop, you can earn an extra $25 dollars to spend on fun Stampin' Up! product! It's a great way to mark off more items from your wishlist!

E-mail me today to schedule your workshop!

rebeccafellows@mac.com